FAQ Setup

Installation & components

This page answers the most common questions regarding installation and finishing of a Neonest bed system. It is intended for manufacturers, upholsterers, and professional installers.

These guidelines are based on our practical experiences. Neonest is a new product, and some applications may require trial and adjustment. We are confident that additional, and possibly better, methods will emerge over time, and we welcome feedback based on your own experience.

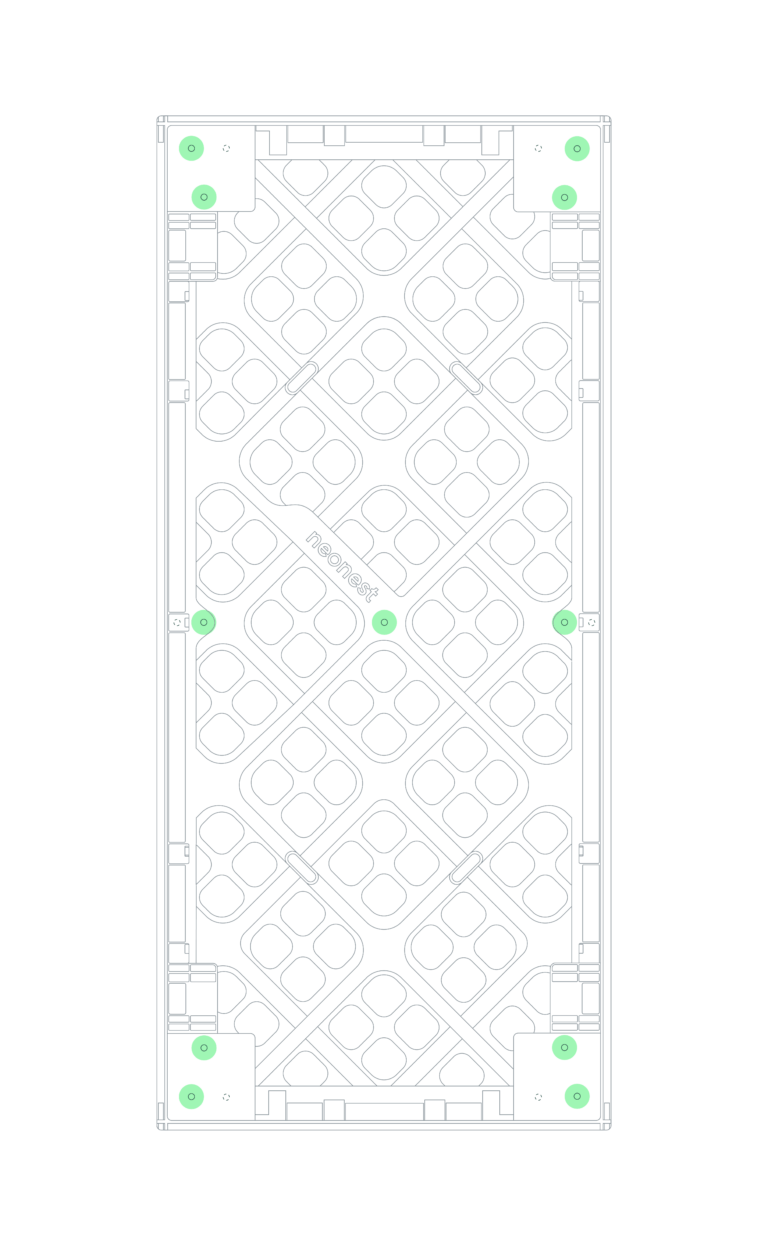
The frame has 11 leg positions:

  • 2 on each corner (visible and hidden position)
  • 3 along the middle


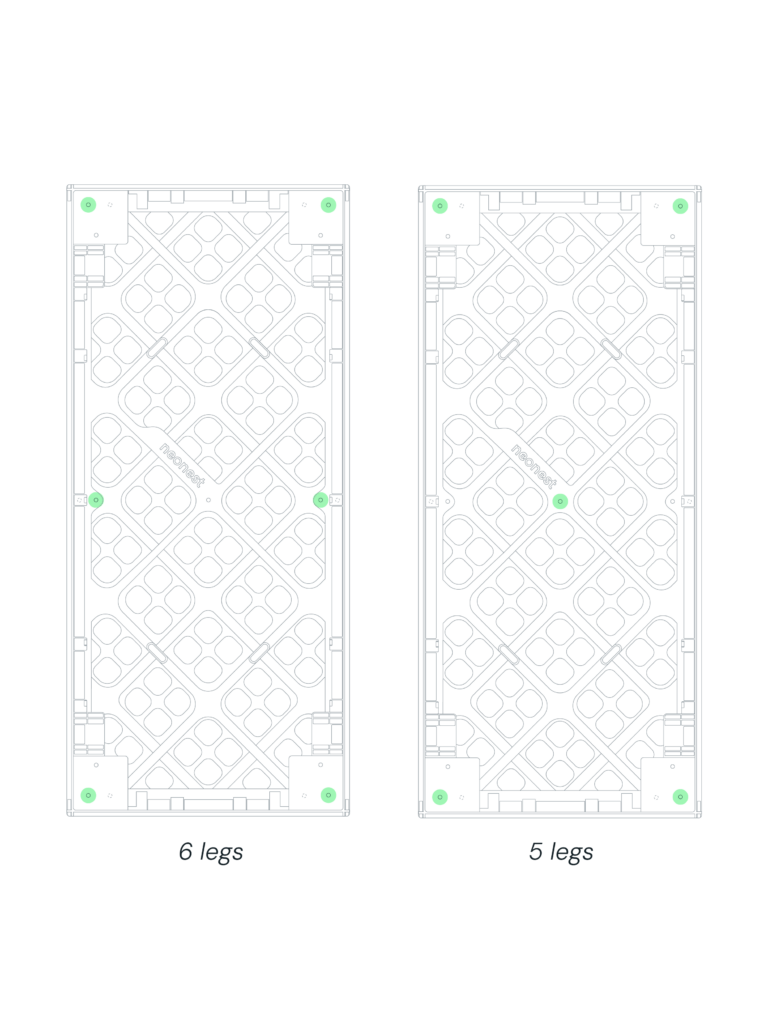
The frame will come standard with 6 pre-installed M8 inserts, 1 on each corner and 2 on the sides in the middle. On positions where inserts are missing, they can be installed easily by screwing M8 inserts into the prepared holes.

Special or corner legs can also be screwed directly onto the flat corner surfaces.

  • Recommended: 6 legs (maximum stability)
  • Alternative: 5 legs


If using 5 legs:

  • We recommend using an adjustable middle leg
  • Lower it until it just touches the floor
  • No weight should rest on this leg during installation

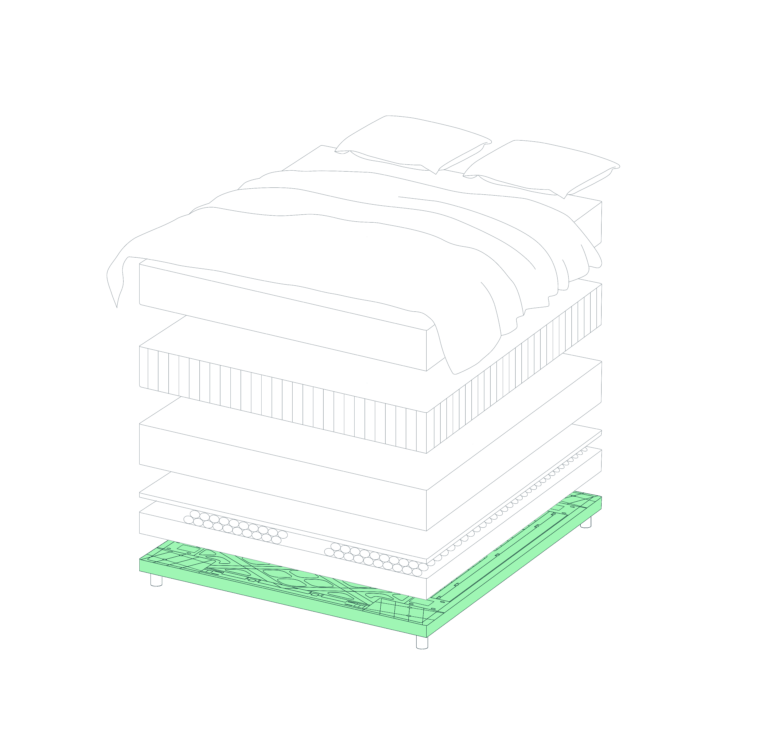
The Neonest frame is the base of the bed.
The simplest setup is:

  • Frame + 5 or 6 legs + upholstered cover


For higher comfort, the frame can be built up with:

  • Foam
  • Springs
  • Boxspring layers
  • Others…

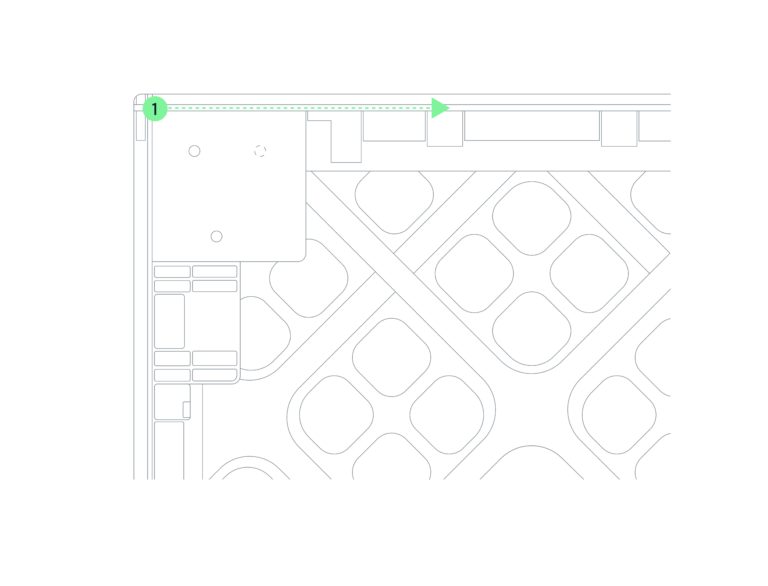
A groove runs along the bottom edge of the frame. This groove is used to fix upholstered covers with Neocord.

Installation steps:

  1. Start at the head end
  2. Insert the Neocord into the groove
  3. Make sure neocord does not cross into grooves on the side of the frame
  4. Fold excess fabric under the cover and put away excess fabric into the cavity in the corner
  5. Insert the neocord along the length, and use the cord to lock the corner in place
  6. Repeat on the foot end, work evenly along the frame

For clean corners:

  • Fold excess fabric inward
  • Push it into the corner cavity
  • Lock it in place with the Neocord along the length

Tip:

  • Pre-press lightly by hand
  • Finish with a soft, flat hammer or roller for easier insertion

Yes. Covers can also be fixed with staples.

Recommendation:

  • Use the thin strip along lower edge of the frame, next to the neocord groove.
  • Staple evenly for a clean finish

Yes. Two common options:

  • Skirt cover (reaches the floor).
    → Adapt cover to be the same height as legs + frame
  • Flat cover (same height as frame)


Loose covers are suitable for non-permanent or decorative applications. Often used in hospitality sector.

Yes. The frame is plastic so synthetic fabrics can be welded on with heat or ultrasonic vibrations. Other options include glue (messy, harder to separate),
velcro, etc…

Neocord is a plastic cord that is sewn into upholstery fabric covers and pressed into the frame groove.

It creates a clean, removable fixation system.

The system is recommended to be one-time use. It is not designed to remove and reinsert multiple times. Damage to the seams of the covers can occur when removing the cover from the groove too often.

You will need roughly 6m for a 90*200 bedframe and 12m for a 180*200cm.

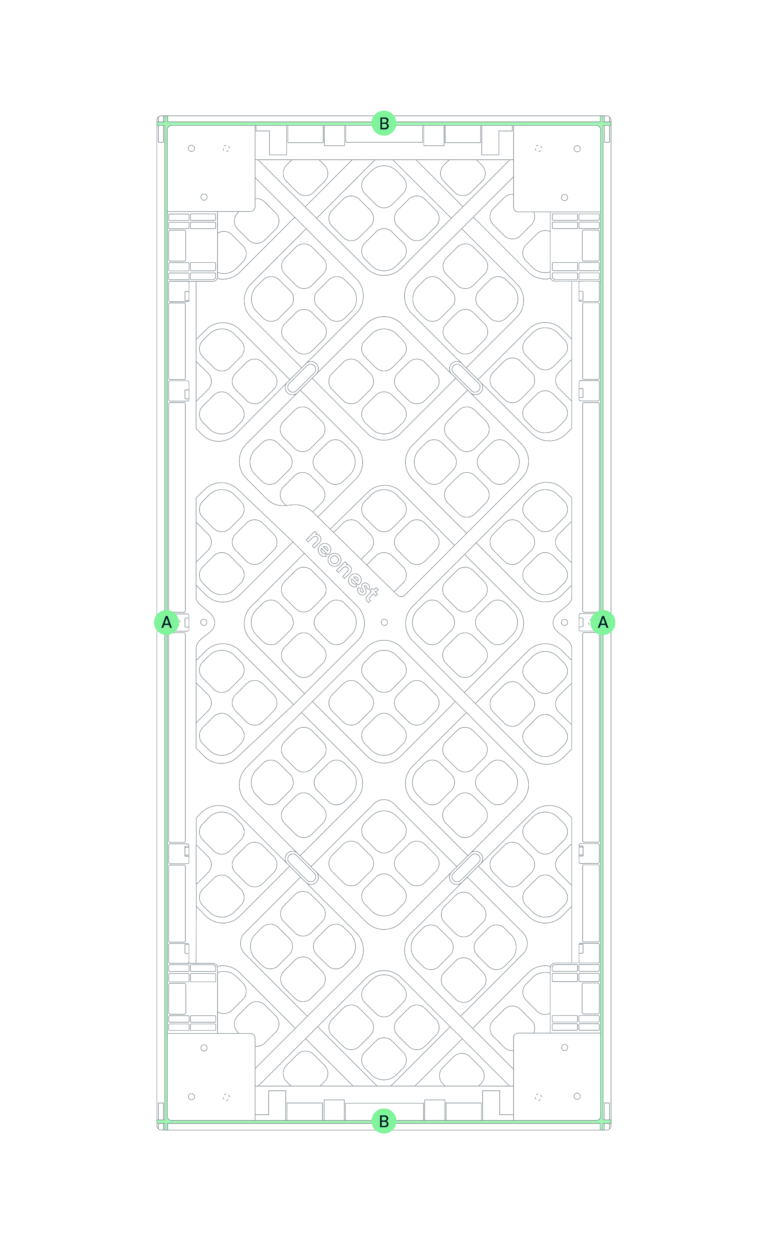
Four pieces are required:

  • A — 2 along the length (±197cm)
  • B — 2 along the width (±84cm)


Measurements:

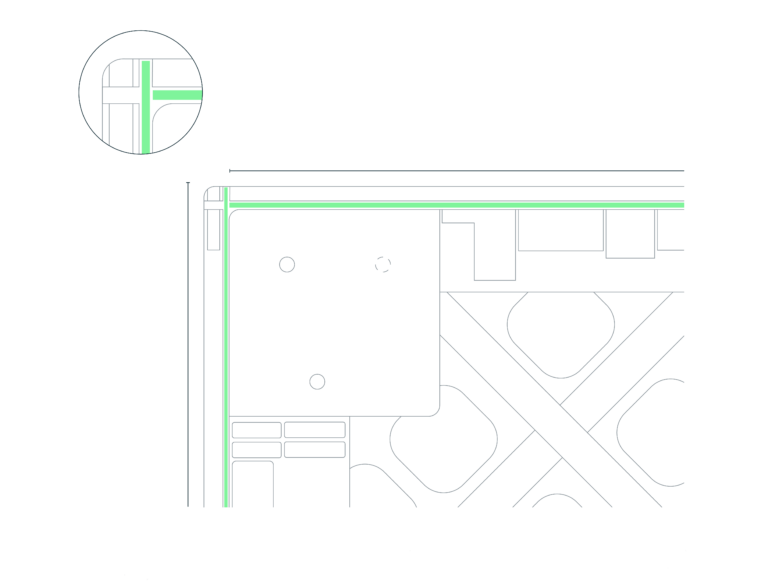
  • Head and foot: groove to groove, not full length edge to edge
  • Length sides: frame edge to edge, full length of groove
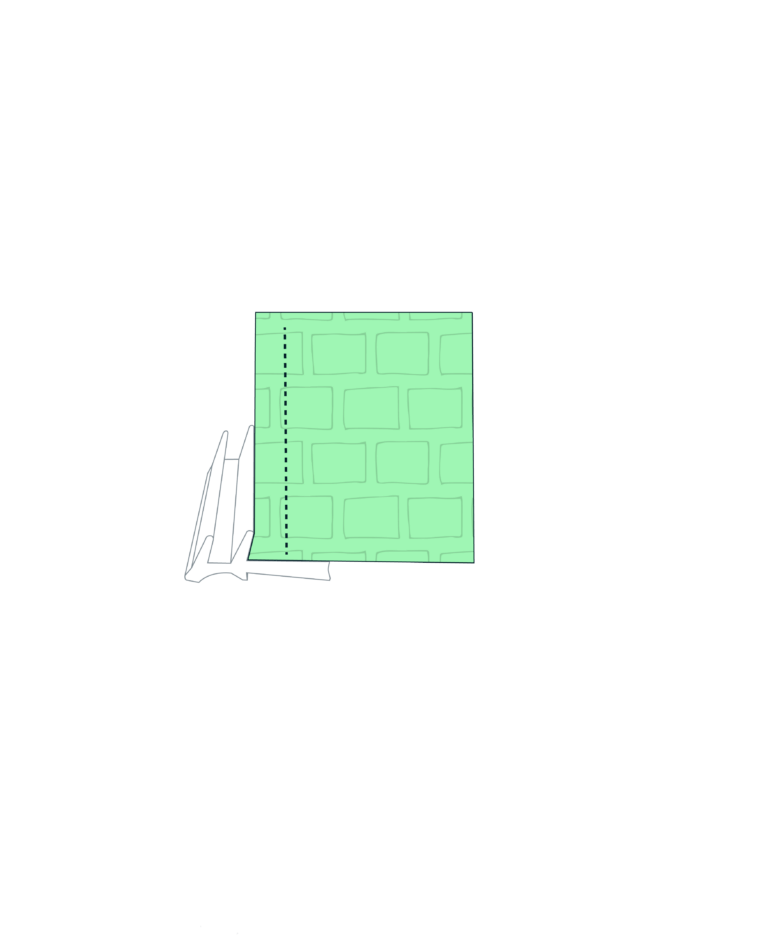
  1. Place the wrong side of the fabric against the flat edge of the cord. Make sure the barbs face outward and the fabric reaches the lower barb.
  2. Stitch the fabric securely to the flat edge.


This ensures secure locking in the groove.

Yes. Example:

  • Two 90×200 frames connected with Neoconnect → one 180×200 bed
  • Use one 180×200 cover


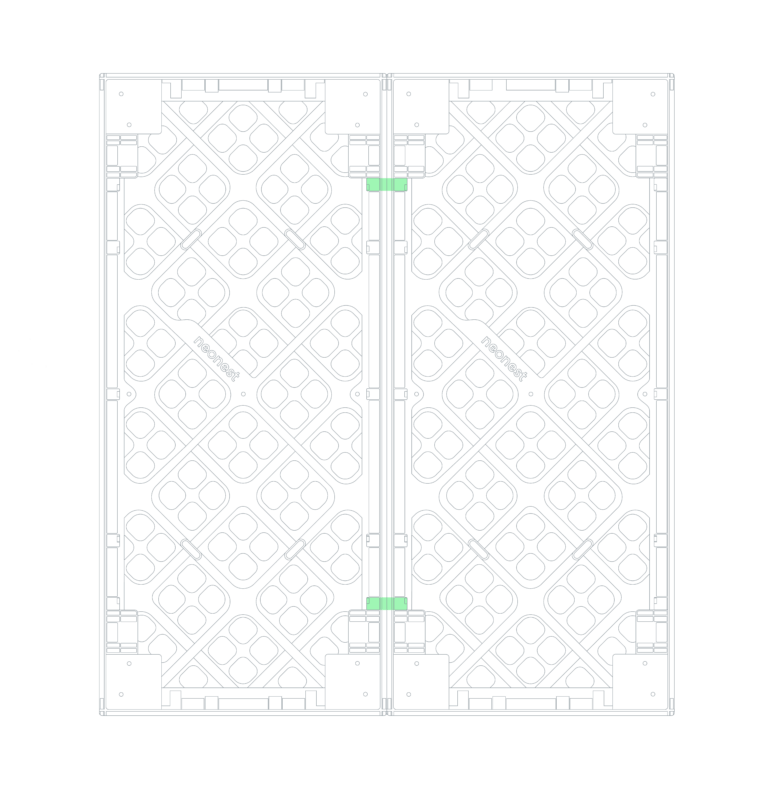
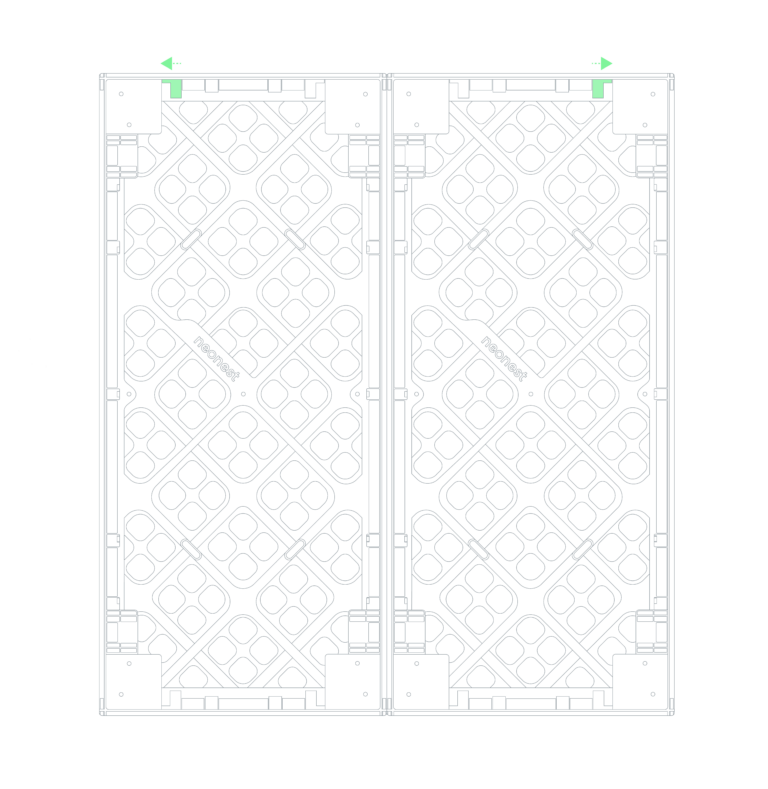
How to run Neocord across both frames:

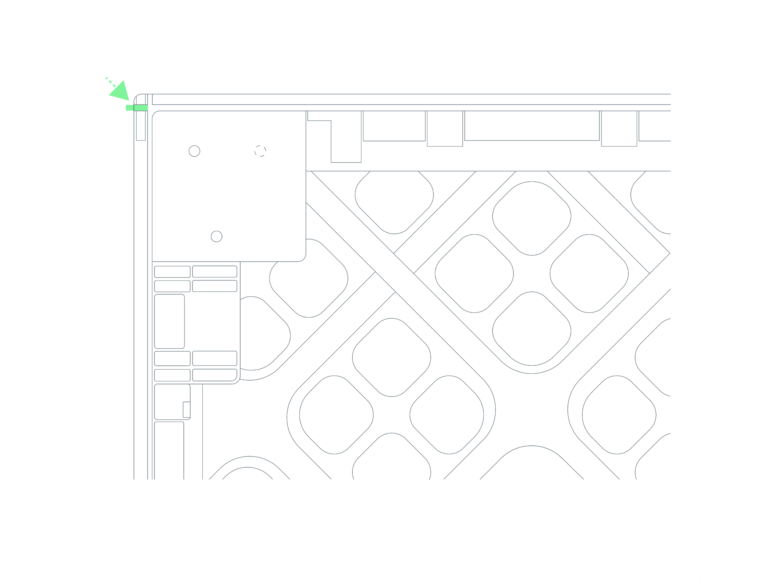
  1. Locate the thin plastic strip at side of the frame on the neocord groove at the head/foot ends.
  2. Carefully pierce this strip with a screwdriver
  3. This opens the groove between both frames
  4. Run the Neocord continuously across the two frames


This allows a clean, single-piece upholstery finish across the full width.

Neoconnect is a connector that joins two single frames into one double bed. It inserts into prepared slots on the bottom of the frame and clicks into place.

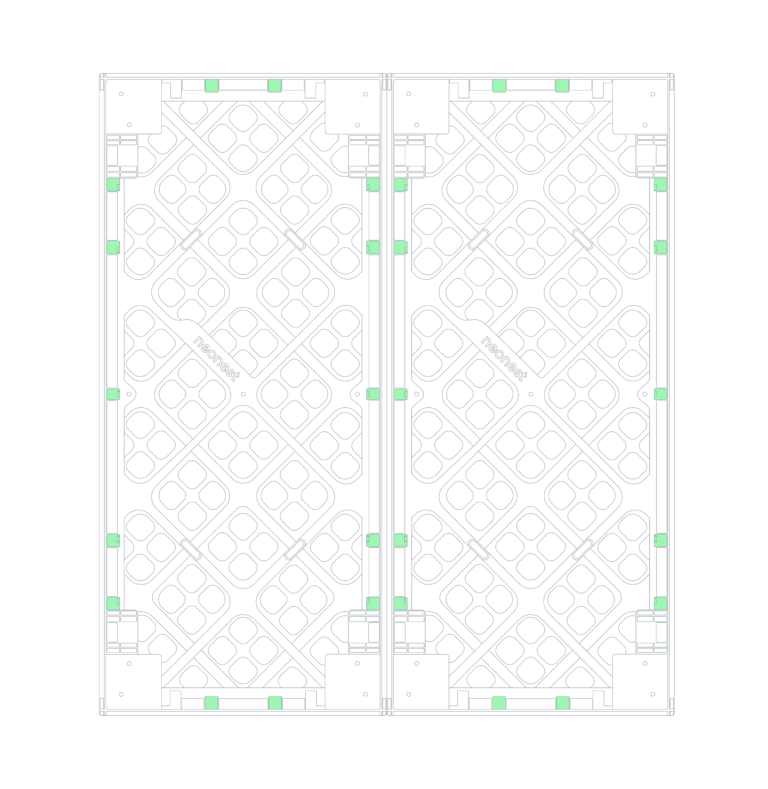
Each frame has 14 positions:

  • 5 slots along the lenght side
  • 2 slots at head and foot side

For double beds:

  • Use 2 Neoconnects in combination with adjustable support legs.


Recommended position:

  • First slot from head and foot end.


This provides maximum stability.

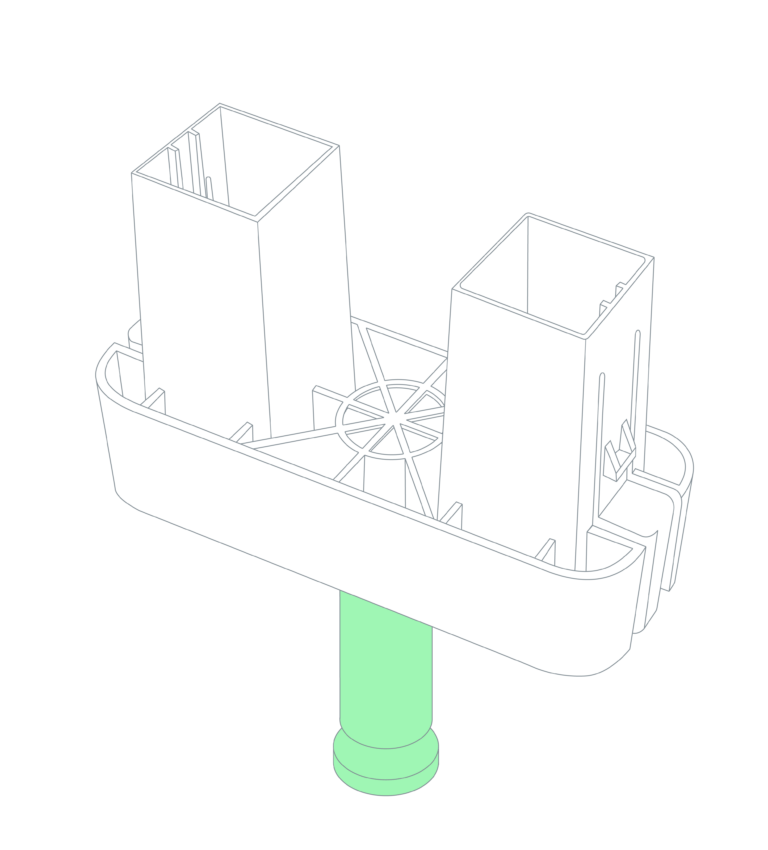
Each Neoconnect can be fitted with adjustable support legs.

Installation:

  1. Push leg into central cavity until you hear or feel a click
  2. Adjust height to match with legs of bed (1mm less than legs is ideal).
  3. Lower until it lightly touches floor


No weight should rest on this leg during installation

  1. Press the release tabs on both sides
  2. Pull connector out evenly
  3. Do not twist the connector to ensure smooth release

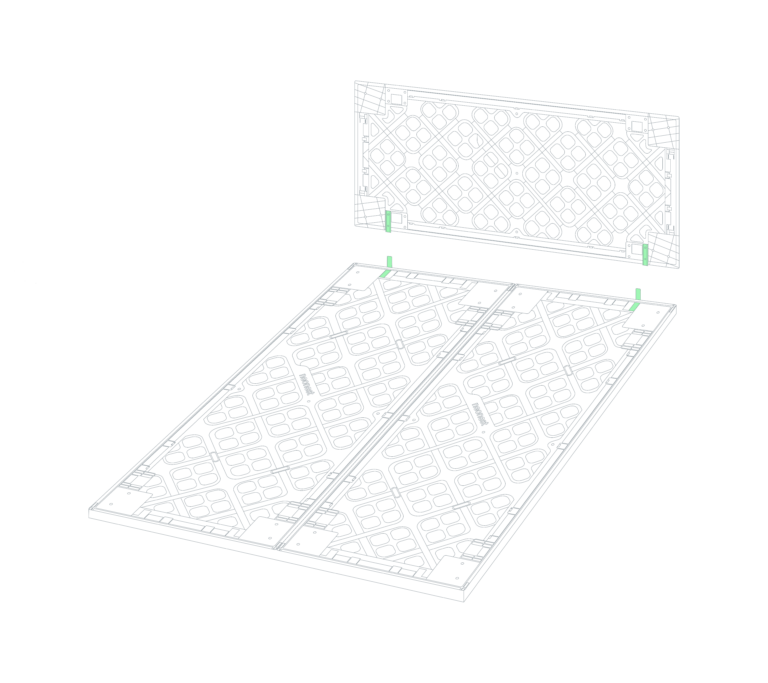
Neohold allows the frame to be used as a headboard.

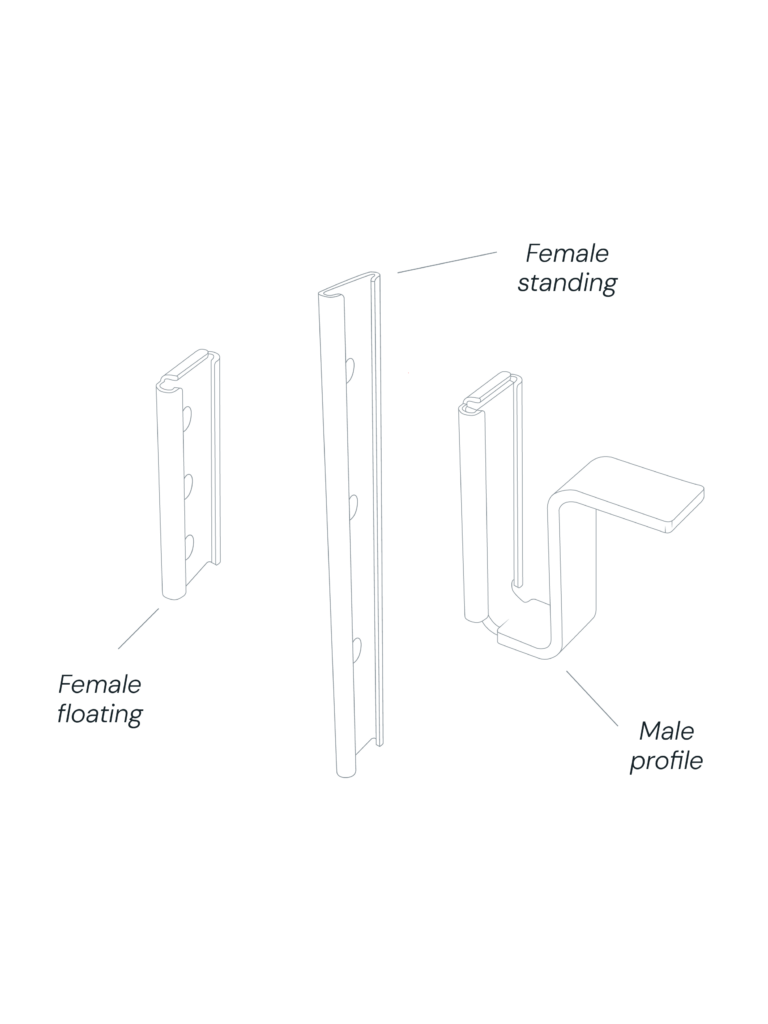
It consists of:

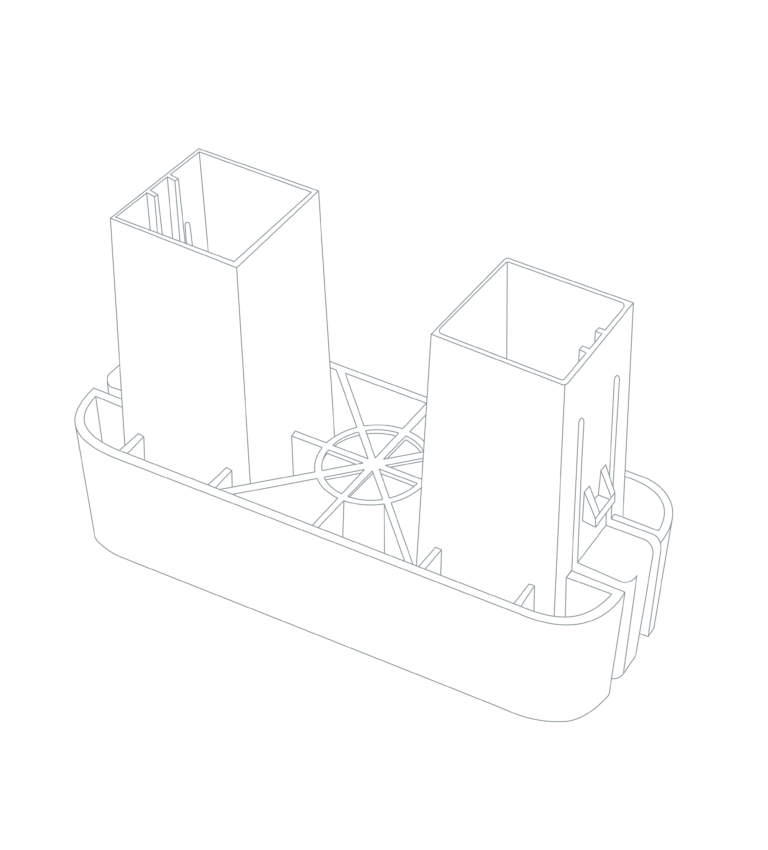
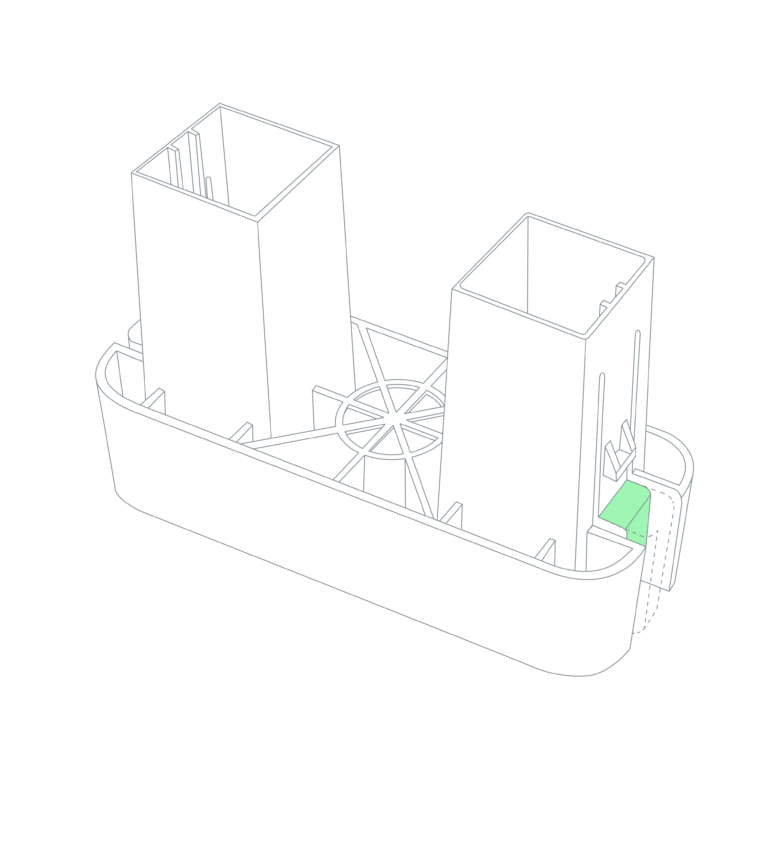
  • Male profile (U-shape, clips into frame)
  • Female hinge (mounts to headboard)
  1. Locate the two positions at head or foot end to insert profile. Pick the outside position.
  2. Insert flat side into cavity and slide toward the outer edge.
  3. Slide under the tab and push until locked.


Each frame needs one profile on the outer position to attach
the neonest headboard.

No. All Neonest frames share the same design. Only the dimensions differ.

For headboard applications:

  • Select the correct frame length (this defines the width of the headboard)
  • Headboards are typically around 100 cm in height (this depends on your
    design)


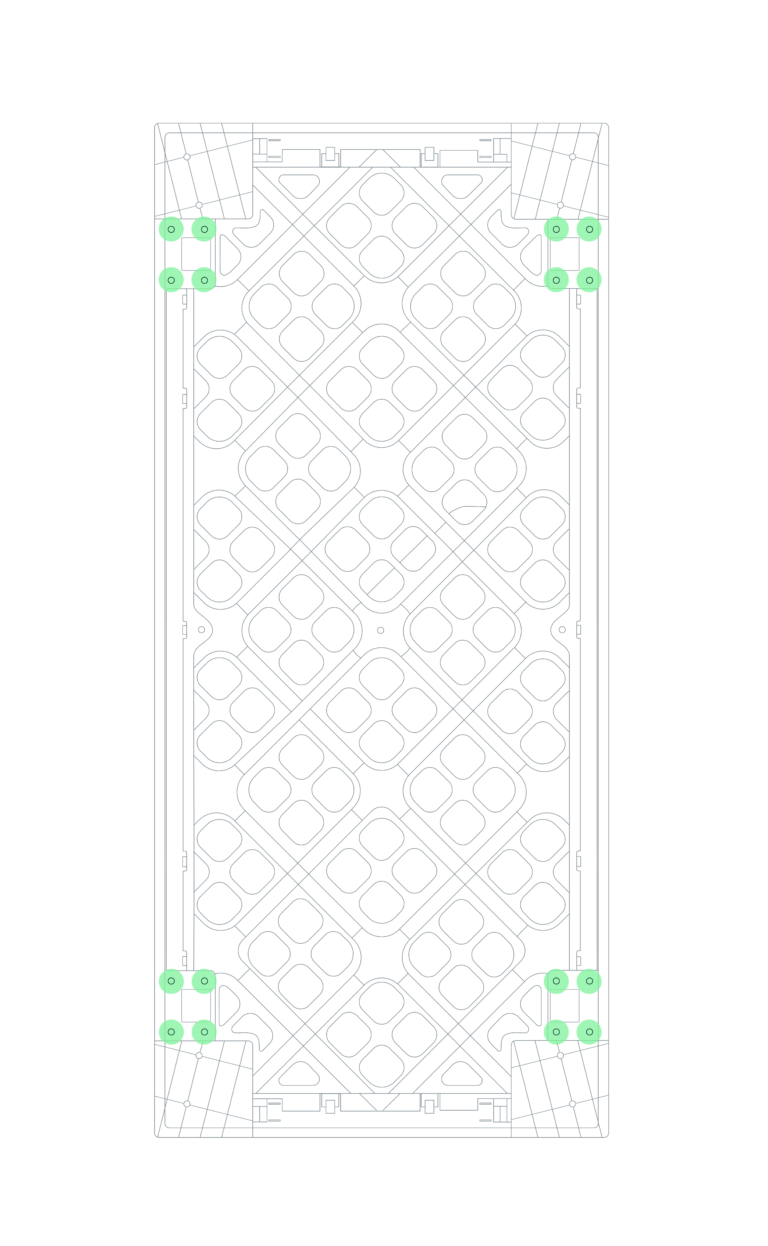
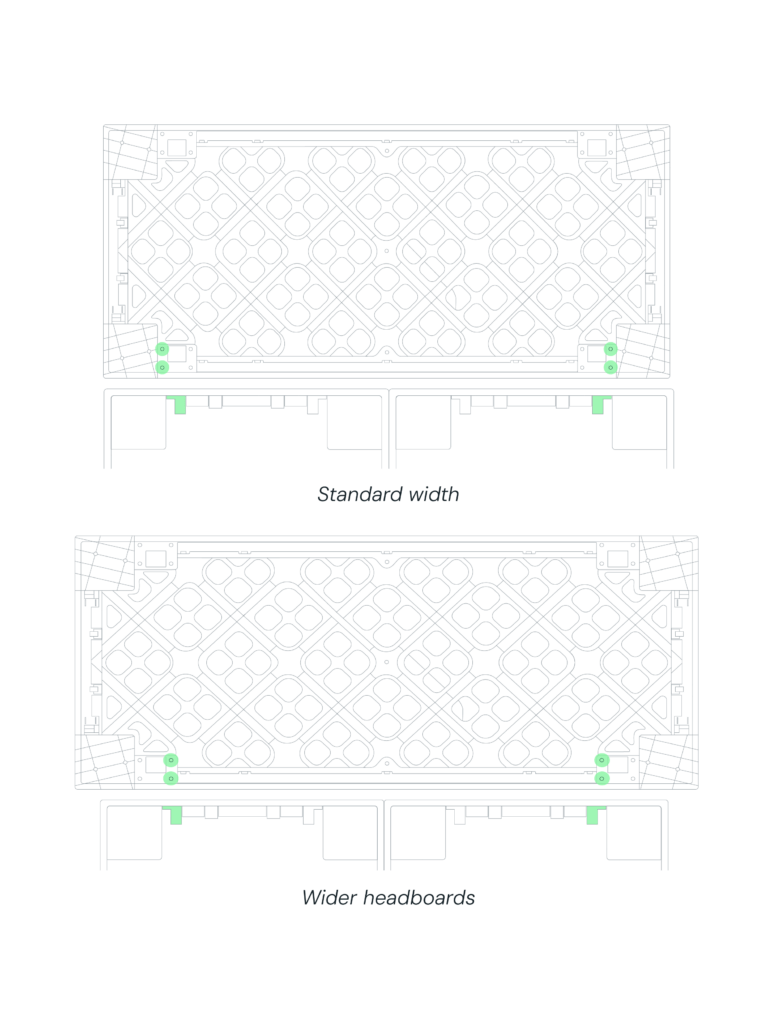
All frames include 16 M6 mounting positions (4 per corner).

Important:

  • M6 inserts are not pre-installed
  • Inserts must be screwed in before mounting headboard hinges

Important:

  • M6 inserts are not standard pre-installed!
  • Screw in M6 inserts first to attach the hinges with screws.


There are 4 holes:

  • Use outer holes for standard-width headboards
  • Use inner holes for wider headboards

Headboards are available in:

  • Same as bed width
  • Bed width + 20 cm (10 cm per side)


Example:

  • 180 cm bed → 180 cm or 200 cm headboard

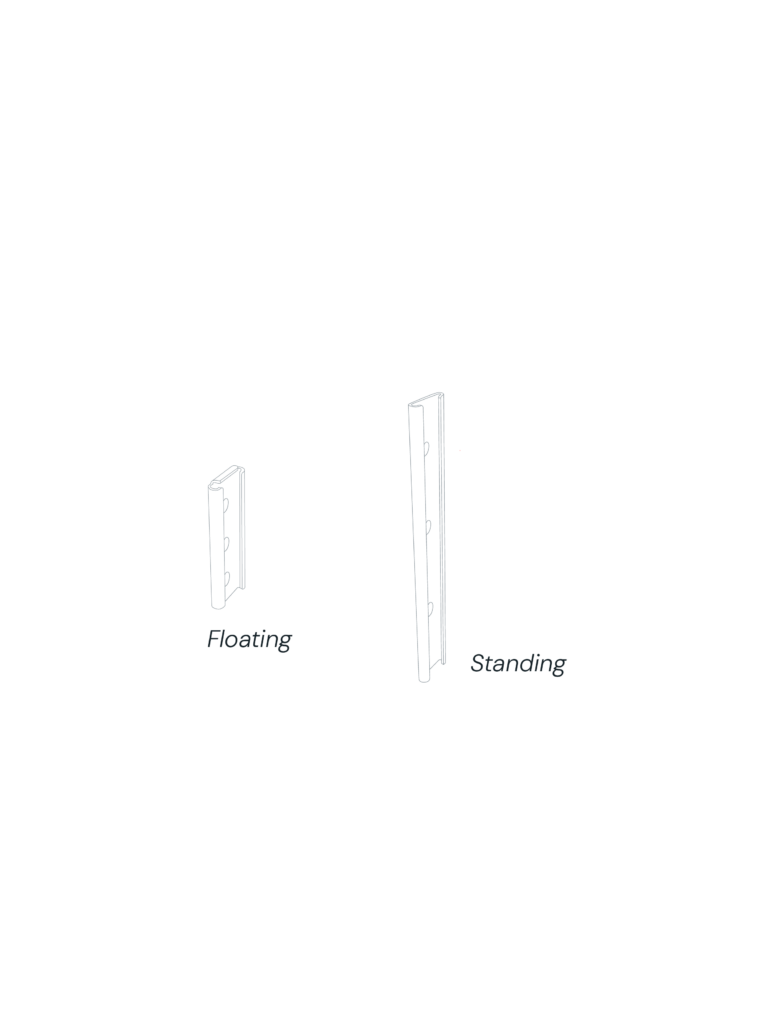
Two versions:

  • Floating (short, with stop)
  • Floor-standing (long, without stop)


Use floor-standing hinges if you want the headboard to rest on the floor.

  1. Screw the hinges to headboard (through the upholstery cover)
  2. Click profiles into frame
  3. Slide hinges evenly onto both profiles
  4. Check alignment and stability

Need clarification?

If any instruction is unclear or does not align with your production process,
please contact info@neonest.tech for support with installation and product development.